
Our world is full of stock photos – billions of them. In the off-chance you’ve seen them all, there are ways to give them a custom-made look. As you’ll see below, it’s pretty easy to edit a stock photo in order to give it your own sense of style and branding.
When you want to give a stock photo a more unique spin, or need a photo to reflect a client’s style guide, or just want to stand apart from your competition who may be using similar images, check out these quick tips on how to create some cool photo overlays.
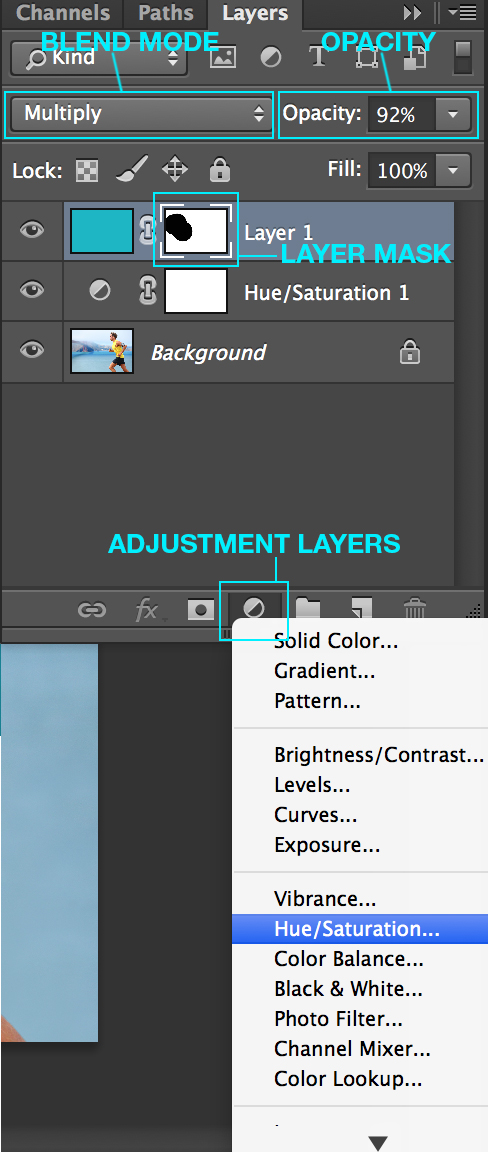
First things first. There are two main types of photo overlays you can use: adjustment layers and color fill overlays.
Adjustment Layers:
To add an adjustment layer, click on the black and white circle icon at the bottom of your Layers palette and you can choose which type of adjustment layer to add. You can find more information about adjustment layers here. And of course, you can go back and adjust these layers at any time.
Color Fill Overlays:
You can create a fill overlay by simply adding a new layer and filling it with a color. My favorite shortcut for this is to first add a new layer, then click Option-Delete (Alt-Delete on a PC), which will fill the layer with the foreground color.
The best way to figure out how to make a stock photo your own with overlays is to experiment and play around, which is what we have done in this post.
You can add an overlay layer, and from there, you can change the blend mode, lower the opacity, or both:
- Change the blend mode by selecting from the pull down menu at the top of the layers palette.
- Lower the opacity (also) at the top of the layers palette. You can also add layer masks to remove portions of these overlays.
Here are three examples of overlays that we came up with.

Original Photo
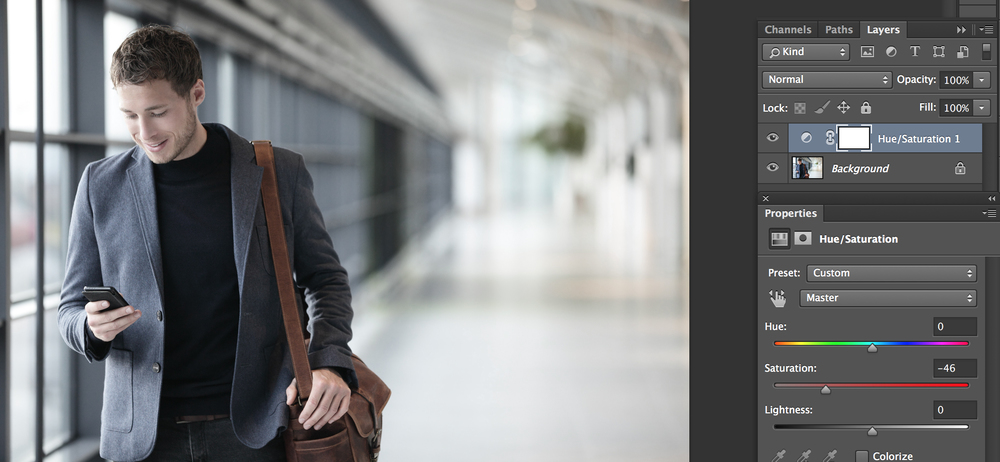
Idea #1:
A hue/saturation adjustment layer with a lowered saturation.
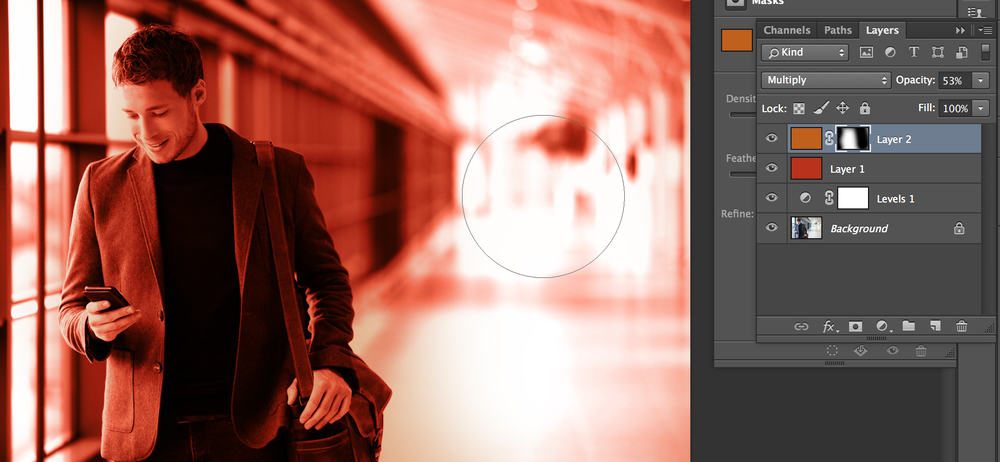
Idea #2:
A levels adjustment layer with a slight adjustment to even out the blacks and whites. A color layer in #bb3212 with a multiply blend mode, and another color layer in #c1600b that has a layer mask to remove some of the background with a soft brush.
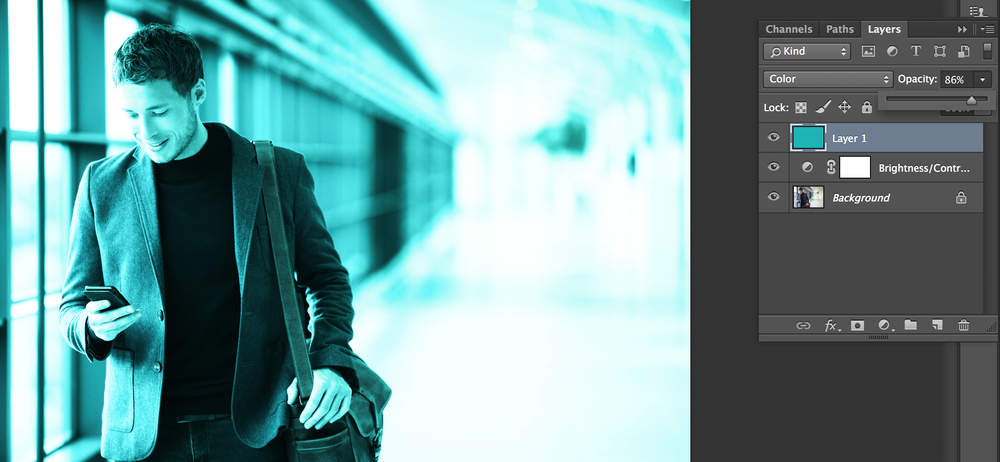
Idea #3:
A brightness/contrast adjustment layer with the brightness and contrast both raised. Also used a color layer in #04b3b5 at a lowered opacity and a color blend mode.
Let’s do another one …
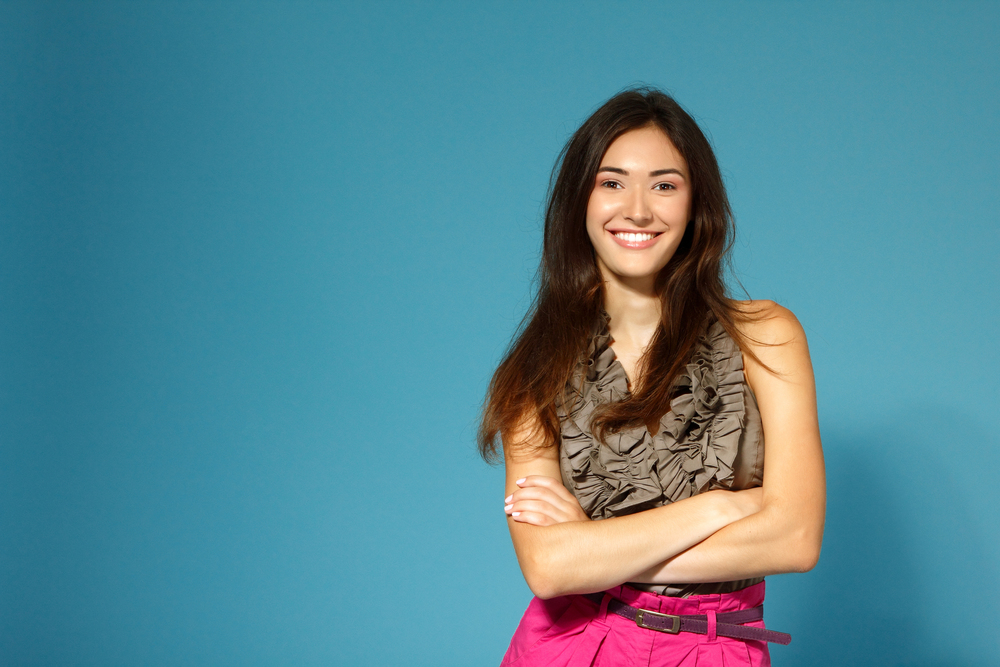
Original Photo
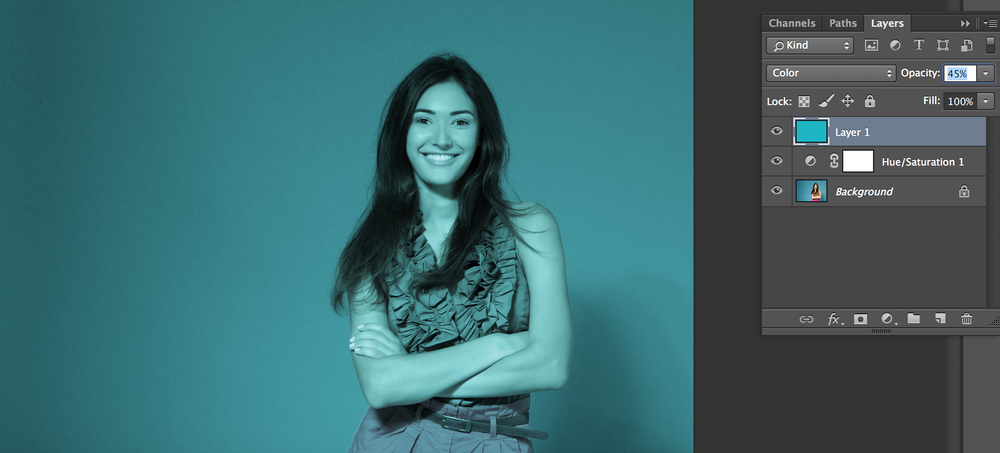
Idea #1:
Hue/saturation adjustment layer with a lowered saturation and lightness. A fill layer with #01b6c6, a color blend mode, and a lowered opacity.
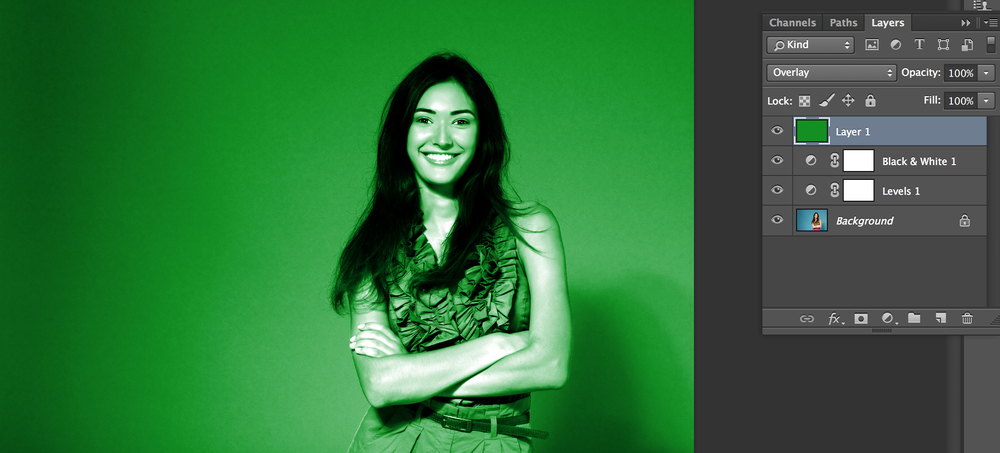
Idea #2:
A levels adjustment layer to raise contrast, with more whites, more blacks, and less midtones. A black & white adjustment layer. A color layer in #019019 with an overlay blend mode.
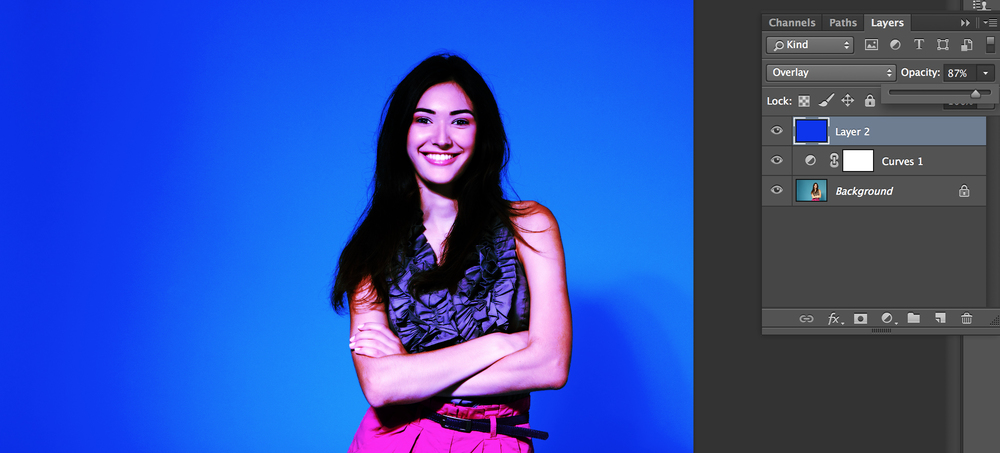
Idea #3:
A curves adjustment layer with a slight S-curve on the RGB. A fill layer in #0526f0 in an overlay blend mode in a lowered opacity.
And let’s do one more …
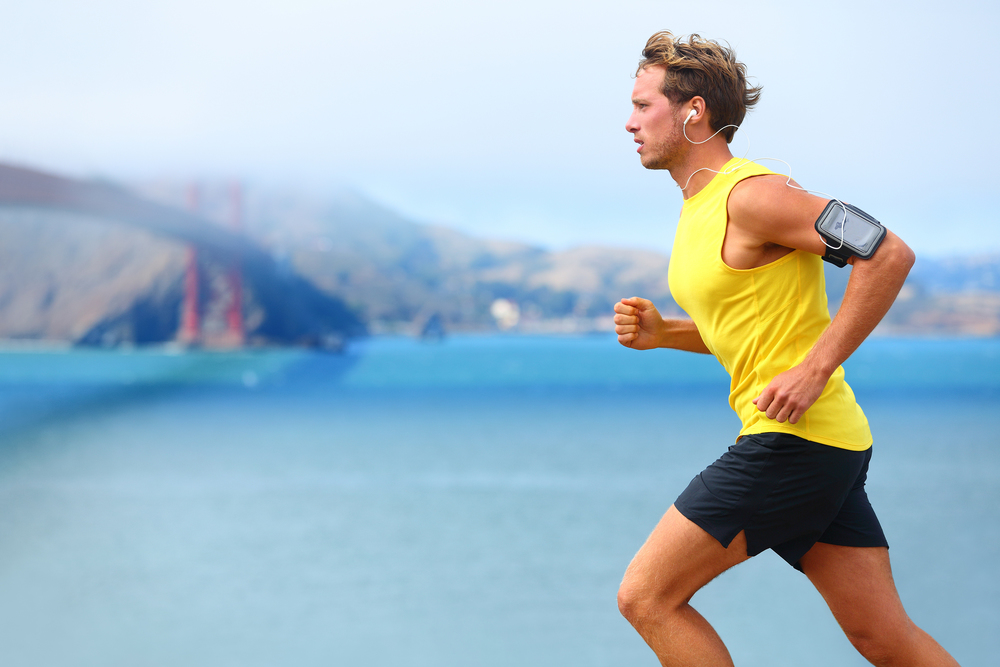
Original Photo
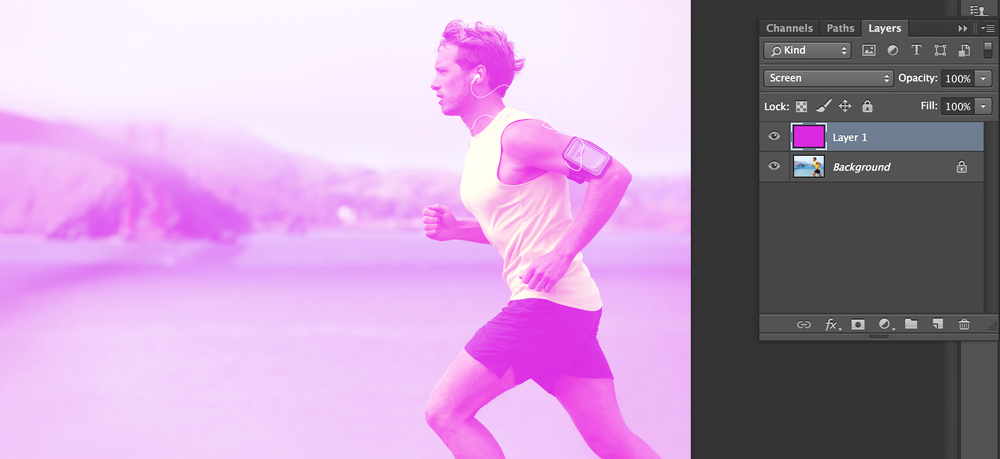
Idea #1:
Fill layer in #f129f8 in screen blend mode.
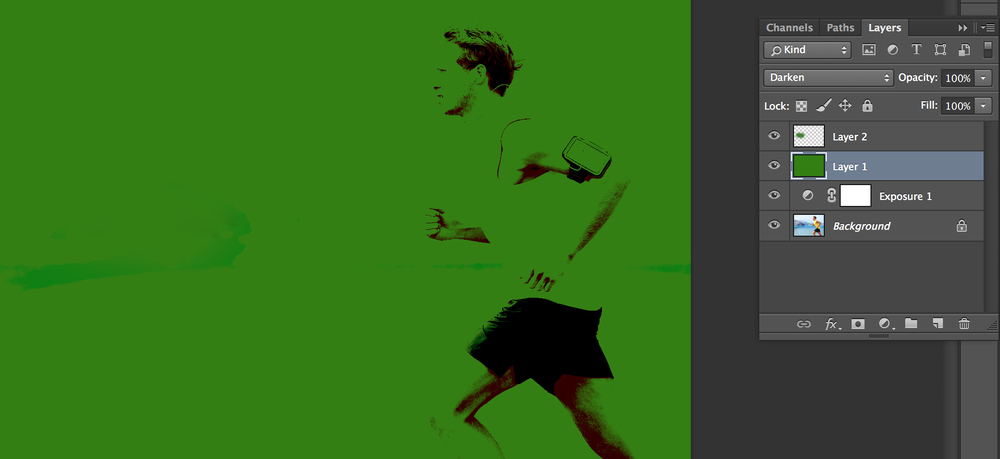
Idea #2:
Exposure adjustment layer with a high exposure and a lowered offset. A fill layer in #318002. One more layer with a brush to cover the remainder of black in the background.
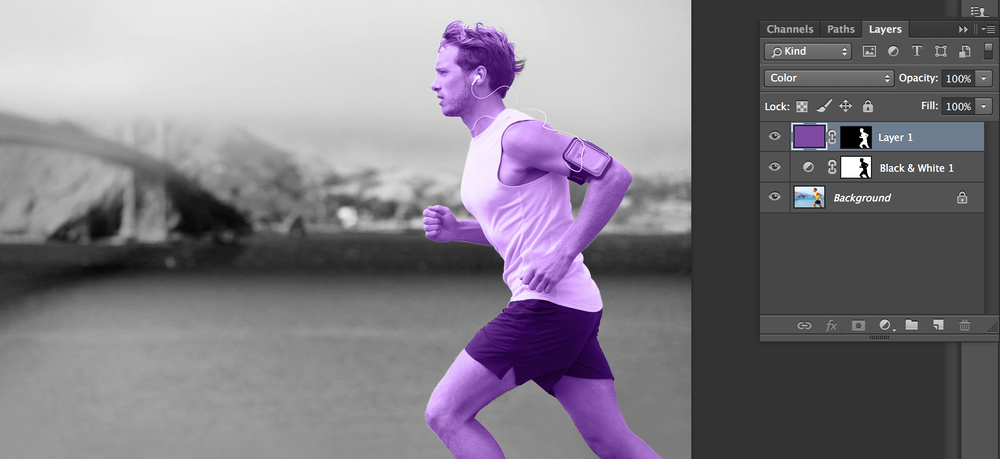
Idea #3:
Black & White adjustment layer, which has a layer mask to remove the layer where the runner is. Fill layer in #7f48a5 with a color blend mode and a layer mask to remove the color where the background is.
As you can see, it’s fairly easy to switch up a stock photo to give it a more unique look, or a look that more closely relates to your brand or project. Experiment away, and happy creating!
Header image is from Bigstock contributor Wavebreak Media Ltd.
