By Karl Rosencrants, Bigstock Contributor
Photography, at its core, is the creating and capturing of images, and light is the foundation of making such images amazing. It is the direction, absence, intensity, color, and size of the lighting that alters the look of a photograph and creates stunning art work.
As photographers and artists, what we do with light in our work can either create bad or great looking images. In other words, a great photographer is a master of light.

That said, let’s examine some of the basics of using a small flash and the effects it has on a portrait.
To be able to properly use light, you first have to have a basic understanding of how it travels and interacts with its surroundings.
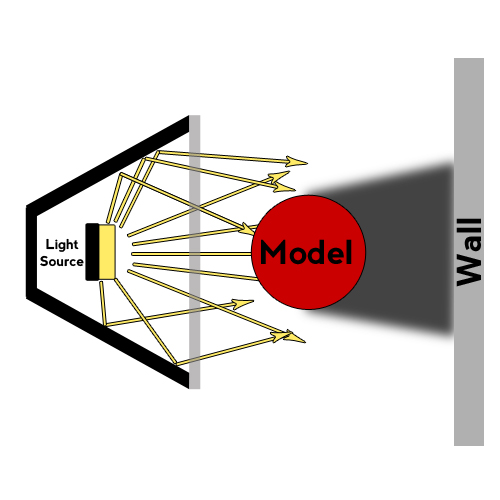
Unmodified light, like that coming from the head of a bare flash, travels in a straight line. When light leaves a flash, it travels directly toward the model. The light that hits the model stops and reflects back to the camera, creating our image. The light that misses the model travels on until it is stopped by something else. In the following examples, that “something else” is the wall behind the model. Since all the light is traveling directly away from the flash in a straight line, it creates a very distinct edge where the light stops hitting the model and starts hitting the wall, thereby creating a very distinct shadow.

Almost every camera on the market these days comes equipped with a built-in flash; however, if you want to take great looking images, don’t ever use this!
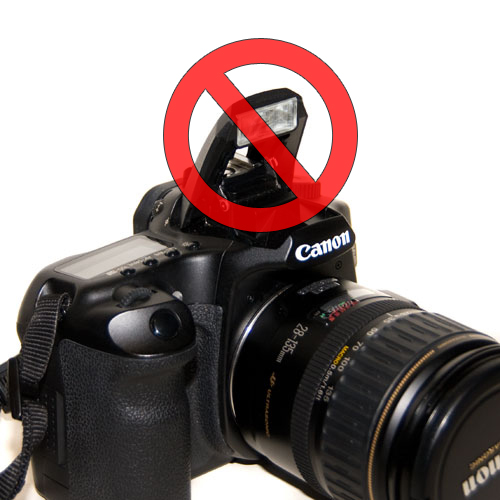
This small, intense flash might be good enough for the company Christmas party, but it is not good enough for creating high quality images. The built-in flash is very small. On this Canon 40D, it is 1/2” x 1”, and sends out very direct light.
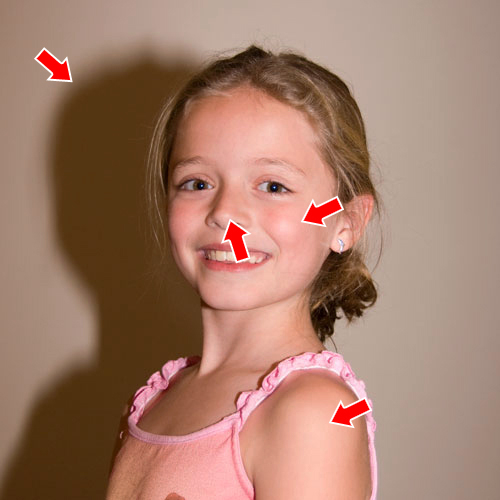
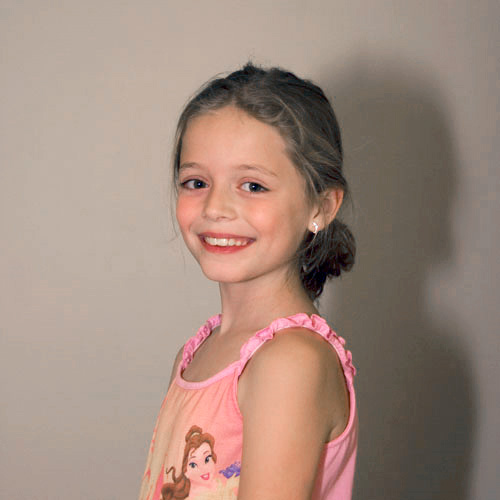
As illustrated above, small, directional flashes create harsh shadows. Take this photo for example:
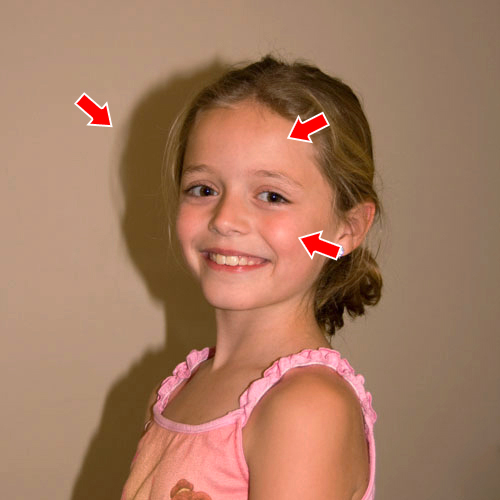
This flash has created two of the most common problems of small, direct flashes. The light has created “hot spots” on this young model’s face. Hot spots are areas where the direct light is concentrated and reflected back, creating very bright areas on the model’s skin, giving it a harsh and unflattering look. Small light sources often cause this because of the concentrated pattern of light. The other obvious issue is the very harsh, dark and distracting shadow.
To fix these issues, most professional photographers use an external flash mounted to the top of the camera or tripod.
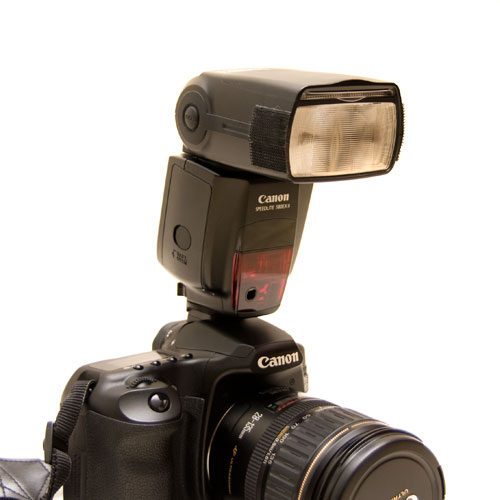
The most obvious difference between this and the built-in flash is the size of the light area. On this flash, the light area is approx 2” x 3”. The mounted flash is also more powerful and able to put out much more light than the built-in. Unfortunately, even though this flash is larger, it still creates many of the same problems as the previous flash.
The hot spots are still present, mainly because this flash is more powerful than the built-in, and because it is still a relatively small light source in comparison to the model. The light source is a little larger, so the shadow is a little less defined, but still very strong.
The lighting so far is not producing great looking images, but we can use this flash to start taking better images by simply modifying the light. And that is where light modifiers come in.
Light modifiers come in two types: diffusers and reflectors.
A diffuser is a box with an internal reflective surface and a white, translucent surface that allows the light out of the box. Diffusers work to spread the light out, while still being a fairly directional light source.
As you can see in the illustration below, the light still leaves the flash in a straight path, but when it hits the inside surfaces of the diffuser, it bounces around inside until it finally leaves through the translucent surface. This scrambles up the light, so when it hits the model, there are light beams traveling in every direction.
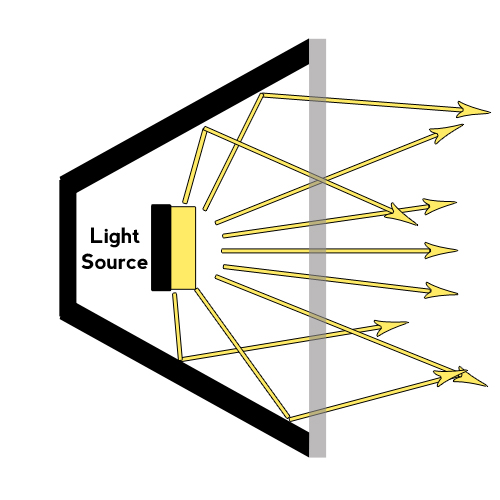
Since the light is traveling in a scrambled pattern, some of the light hits the model and some moves past the model in various directions. Therefore the edge of the shadow that is created is softer and less distinct.
A diffuser also effectively increases the size of the light source. A larger light source does two main things. It spreads out light, eliminating concentrated hot spots and harsh lighting. And since the light source has a larger surface, it allows more light to pass the model, softening the shadow edges.
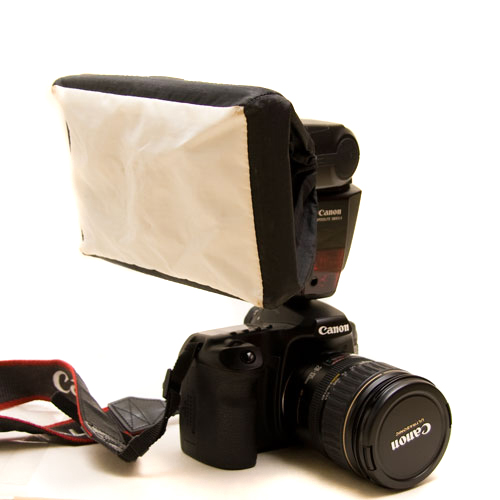
The below photo shows a 5” x 8” nylon modifier attached to the head of the mounted flash.
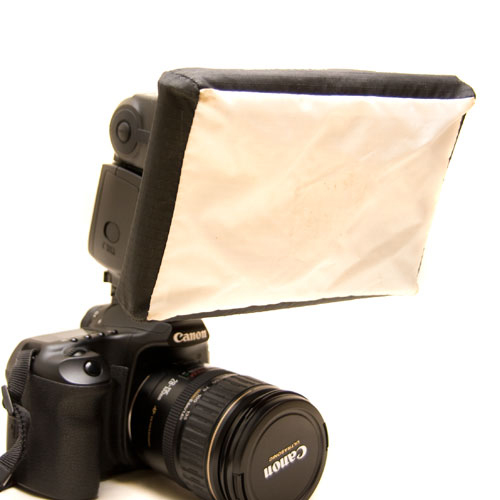
The front of this modifier is a white, translucent material that, when hit with a bright light source, still allows the light pass through. And since all of the white material will be hit with the scrambled light, when it transfers to the subject, it effectively increases the size of the source. So with this modifier installed, our light source is 5” x 8” in size.
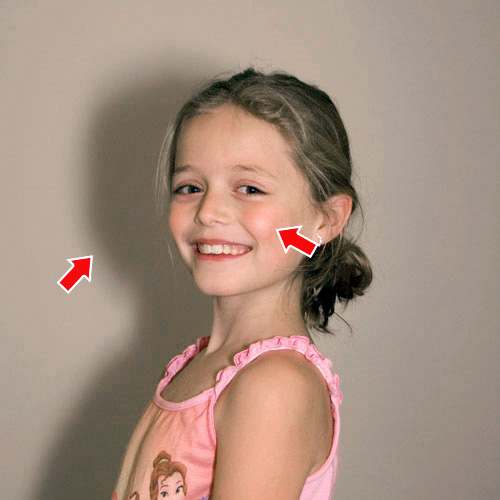
As seen above, hot spots are greatly reduced when using the diffuser. This is partially because the translucent fabric absorbs some of the light, so the flash isn’t quite as intense. The increased size of the light source has further softened the shadow, and the scrambled light helps improve the look as well.
There are other things you can do to further increase the size of the light source. Most mounted flashes have an adjustable head, so they can be pointed in different directions, giving the ability to make use of reflectors, the second main type of light modifier.
Reflectors are surfaces that bounce light from the original source onto a model. A reflector provides some of the same benefits as a diffuser. It increases the size of the light source, eliminating concentrated hot spots and harsh lighting. It also increases the surface area of the light, thereby softening the shadows.
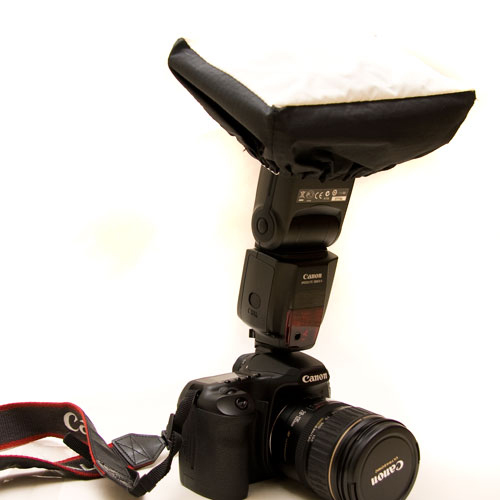
One option is to point the flash head upwards, using the ceiling as a giant reflector. Most ceilings are lightly colored, so they often work well.
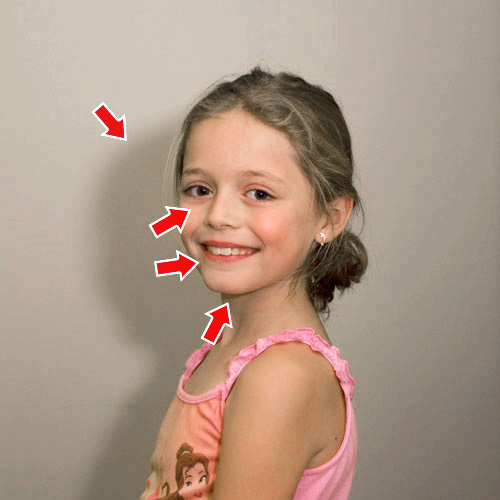
Using the ceiling reflector, the hot spots on the skin are now gone. Because most of the light comes from overhead, the shadow has moved position, now lower than the model. Since the light source is now very large, the lighting on the skin is much softer and a bit more flattering.
Having a light source above the subject has created problems we haven’t dealt with yet. A higher light source creates shadows under the eyes, giving the appearance of dark circles, which is never flattering. It also creates a bit of a shadow under the chin and nose.
If a wall is close by, another solution might be to use the wall as a reflector by turning the head on the flash sideways.
With the entire wall as the light source, the model lighting looks soft and even. Since the light is coming level with the model, the eye, chin and nose shadows are avoided.
A flash mounted off camera and driven with a wireless transmitter is another great choice.
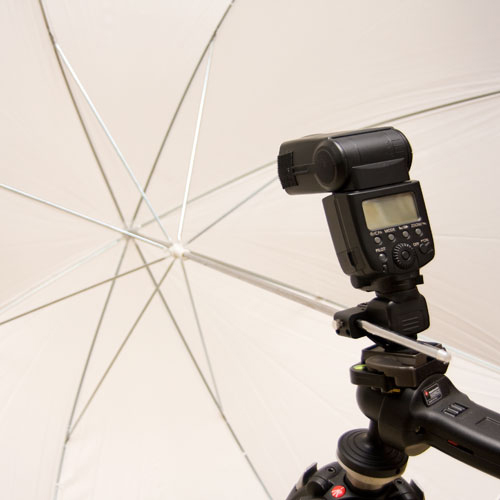
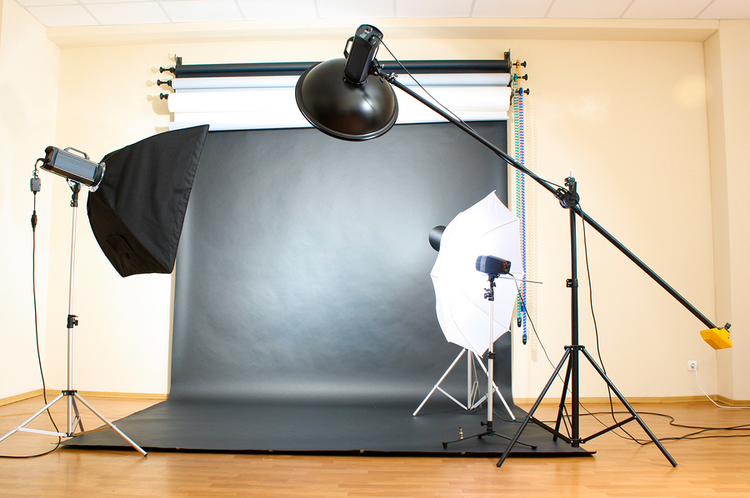
In this example, the flash is mounted onto a tripod and shot into a 42”diameter white umbrella made from the same translucent material as the small diffuser. This essentially creates a 42” diameter softened light source.

In this example, the umbrella was positioned just over the photographer’s left shoulder. Even with the light directly in front of the model, the large size of the light completely eliminates the shadow on the wall. The size of the umbrella also eliminates hot spots. Since the light was slightly above the model, it did create some shadow under the chin, but the edge of the shadow is fairly soft.
Each light modifier and technique offers their own pros and cons. Equip yourself with some basic flashes and modifiers, continue practicing, and you’ll be ready to start shooting some amazing images.
RELATED POSTS: