

A tutorial in movie poster design by Art Director and founder of Pureworks, Victoria Jordan.
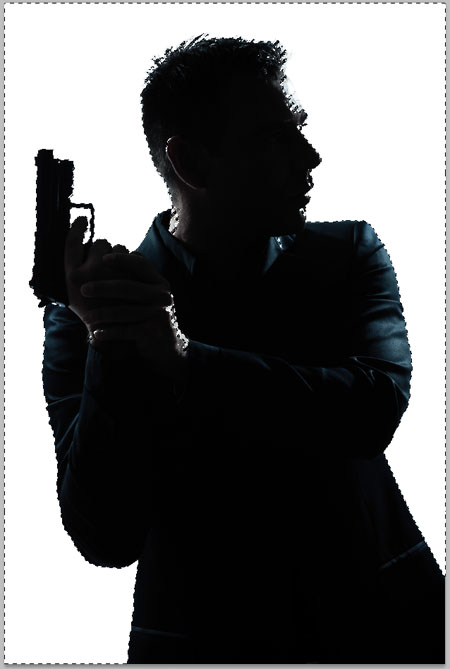
Lately, I’ve been inspired by a few of the big summer movies like the Dark Knight Rises and The Bourne Legacy which I was lucky enough to screen last week (definitely go see it…lots of great action!) As an homage to summer blockbusters, I looked for a subject among the cool images that Bigstock has to offer. I found this one, which I love, that made me think of the new Total Recall remake. With that inspiration in mind, I’m going to design a poster inspired by Total Recall, in celebration of the summer blockbuster. Keep in mind this is just an inspirational ad. Make sure to check copyright laws when working on your own designs.

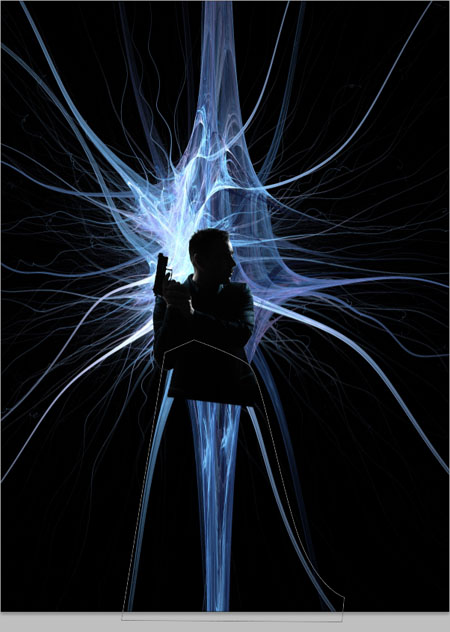
So, looking at this image, I think what I’ll do is put a silhouette of a man with a gun into the middle part of this synapse and then bring the title in at the bottom. For the silo of the man, I’ll go back to Bigstock’s collection…

The first thing I’m going to do is to delete the white background from behind our guy. I’ll go to Select > Color Range and use the eye dropper in the white area of the image. This will select all the white areas.

That worked pretty well, but some of the lighter parts of the image (like his forehead, neck and hand) were selected as well and I don’t want to lose those when I delete the white background so I’ll hold down option and use the Lasso tool to subtract those parts from the selection.
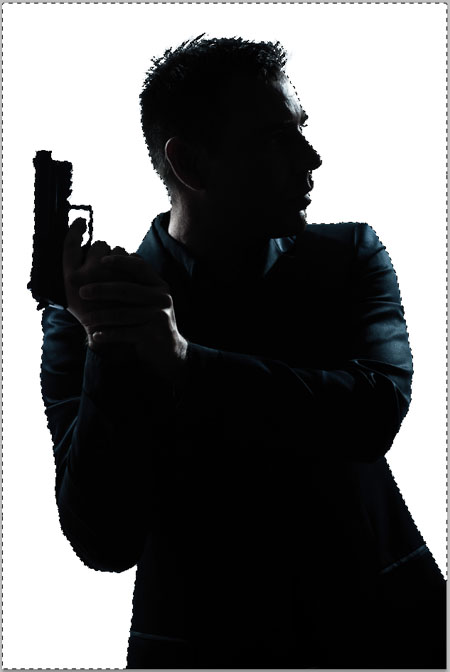
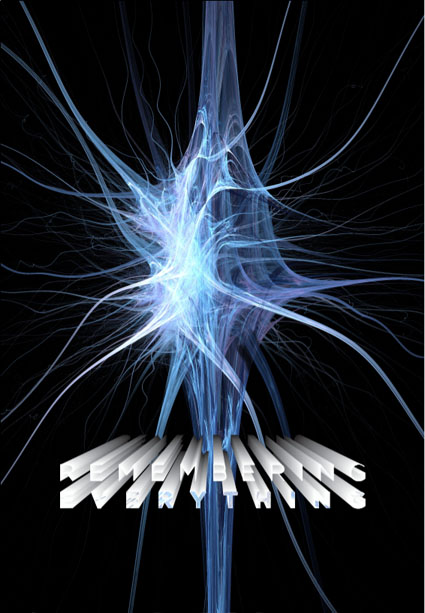
Now I’m going to select the inverse of this selection (Select > Inverse) so that I have our guy selected rather than the white background. I’ll copy, and then paste into our synapse image, which I’ve already rotated 90° clockwise (Image > Image Rotation > 90° CW) so that it’s more vertical, like a movie poster.
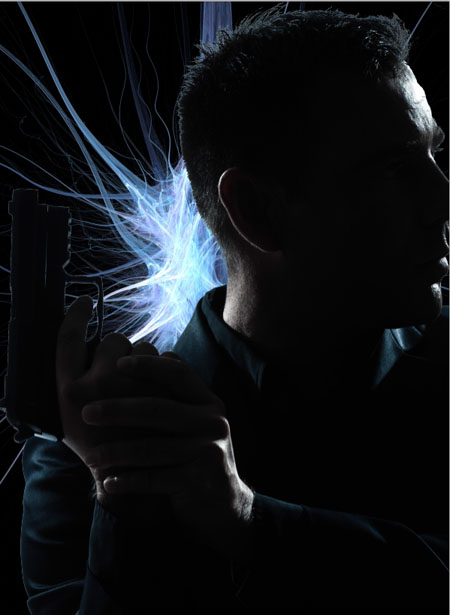
Now, I’m going to scale and rotate our guy to fit into the center of the synapse.
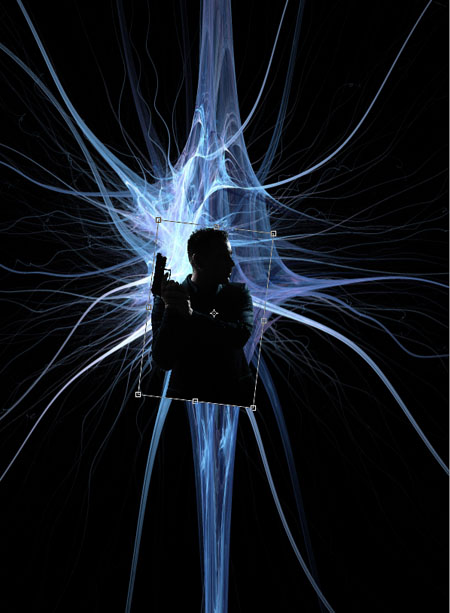
Next, I’m going to use the Pen tool to create a path to block out the offshoots of the synapse that exist beneath our silo’d guy.
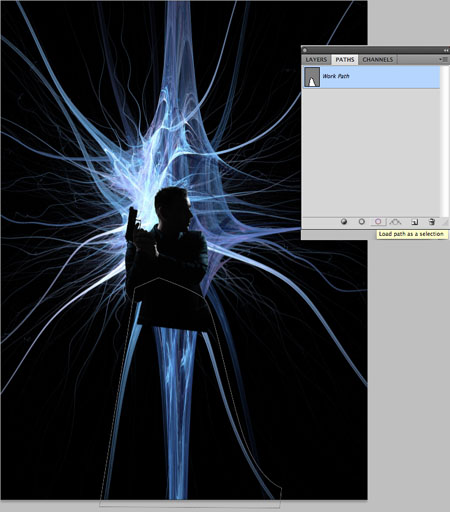
I’ll create a new layer and fill the selection with the same black that makes up the background of the synapse image. [Edit > Fill > Foreground color (use the eyedropper that comes up when this dialog box is on the screen to select the background color of the synapse image.)]
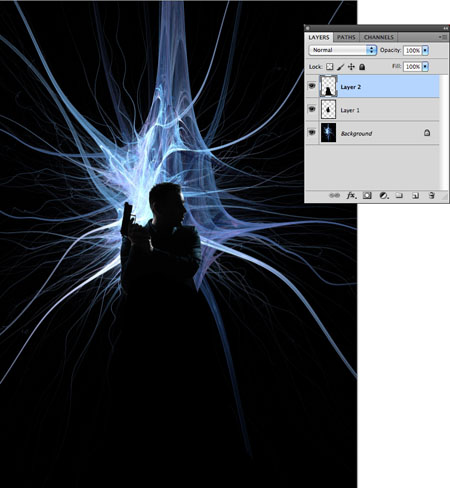
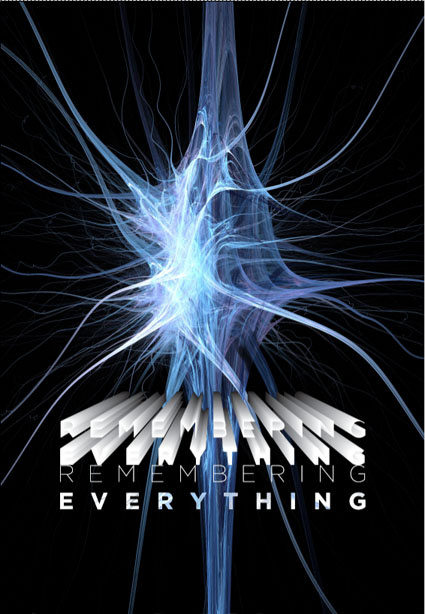
Now I’m going to put in the title. I’d like to use some of the texture that the synapse has in the title so I’ll duplicate the background layer. I’ll do this by dragging the background layer down to the Create A New Layer button in the Layers palette.

OK, I’ve set my type, and I’m going to bring the synapse texture in on the “Recall” part of the title since it’s a heavier weight and will still be readable with a texture in it.

Using the Select > Color Range we used before, I’m going to go back to our duplicate background layer, make the other layers invisible, and select the black in the synapse image. Then I’ll feather it by 1 px (Select > Modify > Feather) so that the edges aren’t so harsh and I’ll hit delete.
Now I’ll duplicate our title layer and turn on the original background layer so we can see the texture of our duplicated synapse as we work. I’ll also duplicate the text layer the same way we duplicated the background layer. Next, I’ll Rasterize the type on this layer (Layer > Rasterize > Type). This will make it into an image and un-editable as text, but it will also make it easier to play with texture.
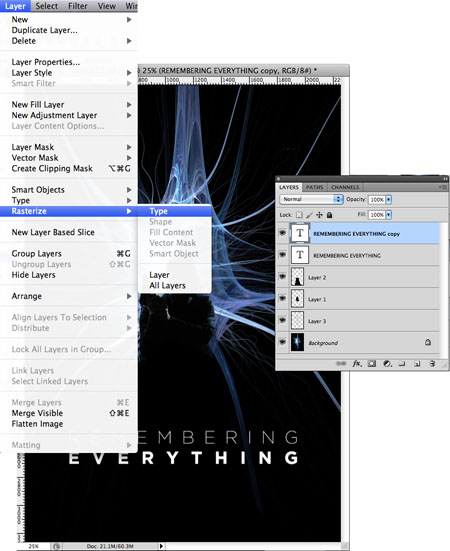
I’ll drag the duplicate background above our rasterized type and position it where I want it.
Now, I’m going to select the “Recall” letters.

Now I’ll go to our first duplicate background layer and Select > Inverse and delete.

I want to make sure that you can see the texture in the letters so I’ll select inverse again and go back to my rasterized text layer and hit delete. Now that it’s allowing some of the black to show through from the background there’s a more vivid representation of the texture.
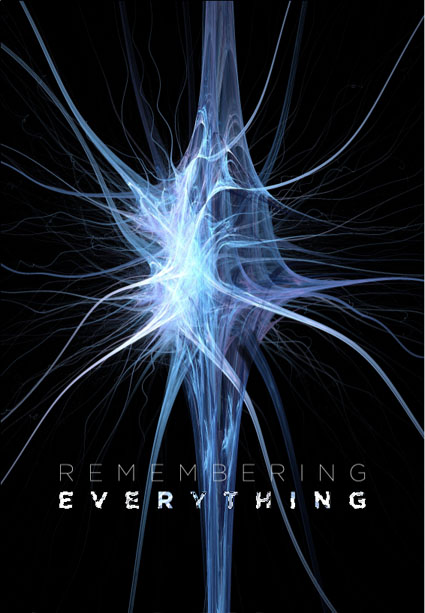
Next, I’ll crop a bit of the right side of this off so that my image and title are centered properly.
We could stop here and have a very simple, clean movie poster, or we could add a simple 3D effect. To do the effect, the first thing I do is open a new document In Illustrator and type set the title the same way I did in Photoshop. Then I make a shape out of the type by going to the Type menu and selecting Create Outlines.
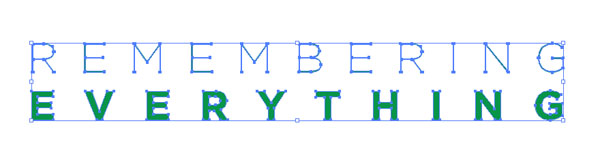

The next thing I’ll do, is to copy the title and drag the duplicate above the first title. (Hold down Option + Shift and click on the first title and drag to where you want the duplicate to be.)
Next, I’m going to scale the duplicate title down so that we can create a growth effect. I want the title to look like it’s emerging from the background of our synapse image. (When you have the duplicate title selected, a bounding box will automatically appear. Hold down Command + Option + Shift and drag from one of these corners to scale down, in perspective and centered.)

Since the background of the synapse is black I’ll send the smaller title to the back (Object > Arrange > Send to Back) and make it black. Since our title is basically white, I’ll make the large title white. Now, I’m going to use the Blend tool to create our growth effect. I’ll select both titles, double click on the Blend tool which will bring up a dialog box in which I’ll select “Specified Steps” (this will allow me to control the smoothness of the growth from small title to big title)…
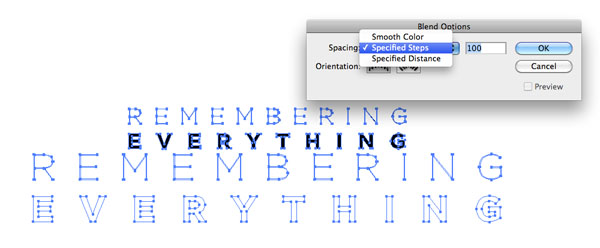
Then I’ll click first on a point in the small title, then I’ll click on the SAME point on the large title (ie. the top right point that makes up the “L” in “Total”). And we’ve made our fab effect!

Now, I’m going to select all (Command + A) and copy and paste it into our Photoshop document as a Smart Object.
Next, I’ll make sure it’s behind our type layers and move it down to where it lines up with the title, and take the opacity of the layer down and…

Voila! We have our movie poster!
