Preparing an Image for Web vs. Print
A Photoshop tutorial by Art Director and founder of Pure Works Studio,Victoria Jordan
When you have a great stock photo, you want to make sure that the quality remains high no matter where it appears. In this tutorial, we’ll go through the requirements for both print and web formats using this wonderful photo from Bigstock contributor George Mayer.
Photo of Two Romantic Girls ©George Mayer
The requirements for print and web images differ greatly.
The first major thing to check when prepping an image is DPI (Dots Per Inch). [Also known as PPI (Pixels Per Inch). “Pixels” and “Dots” are the same.]
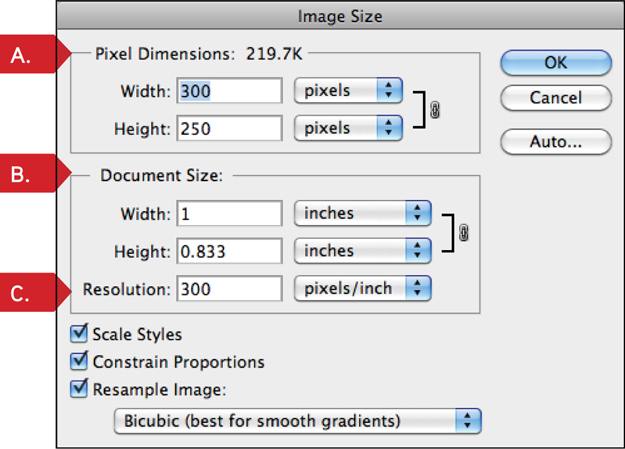
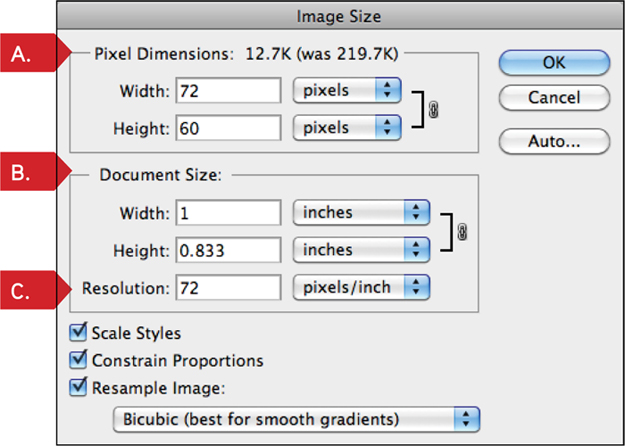
Check out the “Image Size” dialog boxes below for a DPI comparison in the same 1” x .8333” image prepped for print and web.
(Image > Image Size)
For Print…
C. The standard DPI for print is 300.
(There are a few exceptions, for example, when preparing a file for a billboard or other large formats the DPI requirement can be lower. In those situations, ask your print producer for his or her specifications.)
A. The pixel dimensions show you not only the width and height in pixels, but also the amount of space the image will take up, in this case, 219.7K
B. The document size denotes the largest dimensions at which your image can display.
For Web…
C. The standard DPI for web is 72.
A. The pixel dimensions in this dialog are much smaller because of the lower DPI. The amount of space is also significantly less, 12.7K
B. The document size is the largest size at which your image can display.
The second major thing to check when prepping an image is Color Mode.
For Print…
The standard Color Mode for print is CMYK (Cyan, Magenta, Yellow, Black). (Image > Color Mode)
For Web
The standard Color Mode for web is RGB (Red, Green, Blue).
Compression:
For a print image, as long as you’re pleased with the color, etc. you’re ready to go. For the web, it gets a little tricky. At this point, you have your image at its proper dimensions, resolution and color mode. If you’d like to upload it to a website or if the file will end up as a web banner, you’ll probably have to compress your image further. For example, many websites require a web banner to be no more than about 30k. If we go to Save For Web and Devices, we’ll get a dialog that will give us the opportunity to get our size down.
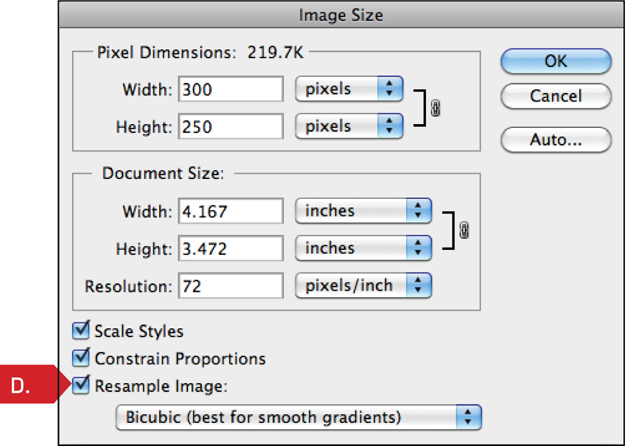
First, we resize the image to one of the standard web banner sizes (300px x 250px at 72 DPI)
Start with the image you prepped for Print, then change the Resolution to 72 DPI. If the Resample Image box (D.) is checked then make sure you change the Pixel Dimensions back to 300 width and 250 height. If the box isn’t checked, the pixel dimensions will automatically stay the same.
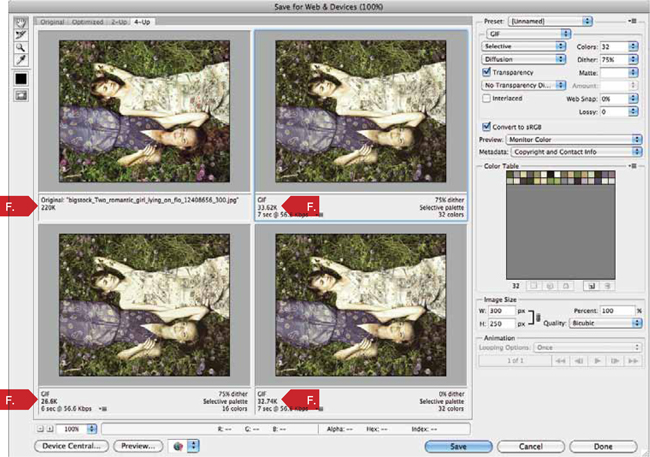
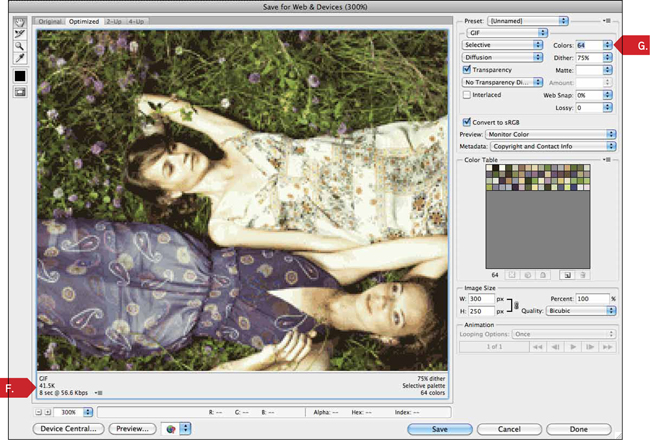
Now, go to Save for Web & Devices (File > Save for Web & Devices). This way of saving allows you to see the effects of various image compressions side by side.
Notice the difference in image size (F.) from image to image. The smallest here is 26.6K. This size could work for our banner, but if you look closely…
You can see what the compression has done to the quality of the image.
Let’s go back to the Save for Web & Devices dialog and see if there’s anything we can do.
Increasing the amount of colors (G.) definitely makes it look better, but it also increases the size.
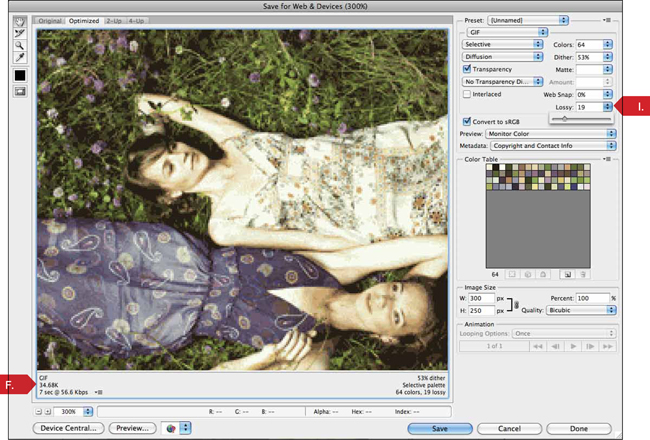
Decreasing the Dither (H.) (definition of dither – http://en.wikipedia.org/wiki/Dither#Digital_photography_and_image_processing) takes it down, but pixelates the image a bit.
Increasing the Lossy (I.) (definition of Lossy – http://en.wikipedia.org/wiki/Lossy_compression) a bit takes it down just enough to get us under our required size. With any of these options, you will lose image quality. The trick is to play with the settings until you get to a satisfactory looking image at the correct size.
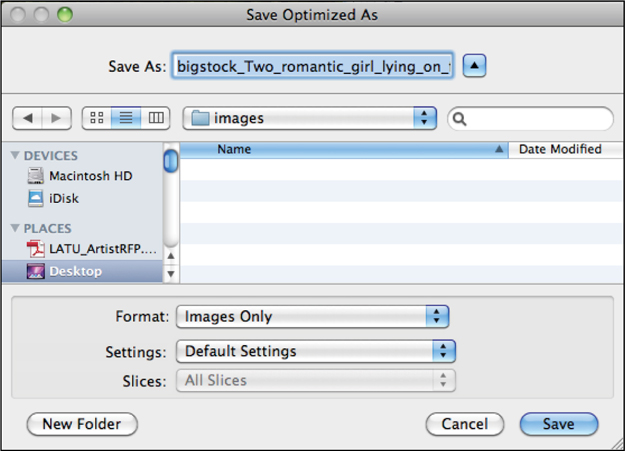
Once you’re there, set your format and settings to your preference in the Save dialog and click Save.


