By Karl Rosencrants, Bigstock Contributor
Photoshop comes with a number of preset gradients, but sometimes the presets are simply not what you need for a certain design. Luckily, Photoshop contains a Gradient Editor that allows you to create custom gradients. Even better, it’s easy to use once you understand the basics of how to use the tool. Let’s take a look.

The best place I have found to access the Gradient Editor is by adding a Gradient Overlay Layer Style to the design. By accessing the Editor in this way, you can see the changes to the design in “real-time” as adjustments are made to gradient.
Start by drawing the shape that needs the gradient, then from the Layers Palette, select Layer Styles, and Gradient Overlay.
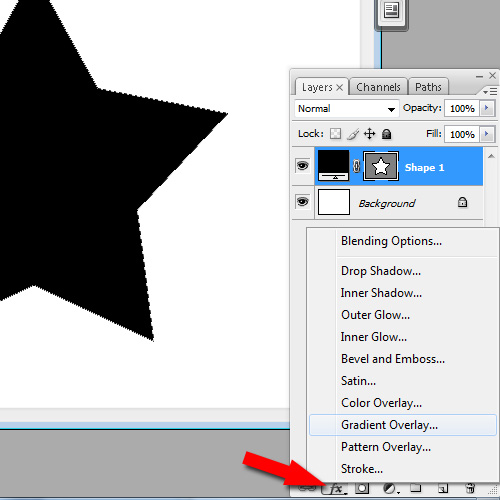
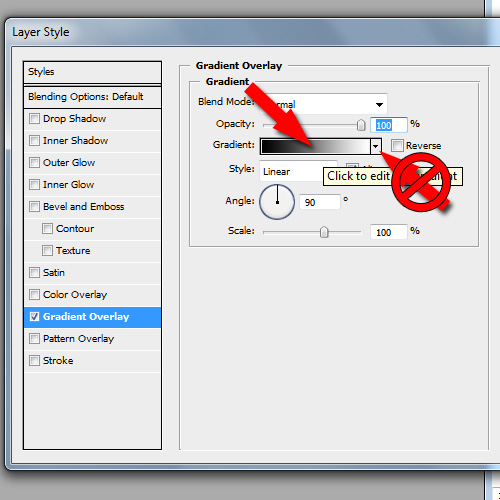
From the Gradient Overlay dialog box, click directly on the sample display of the currently loaded gradient to open the Gradient Editor.
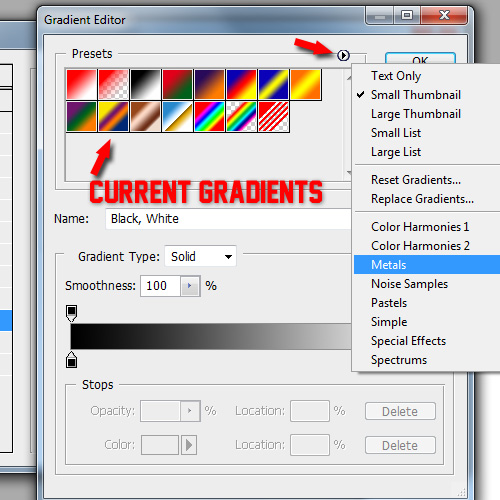
You have a few choices once inside the Gradient Editor. You can choose from the currently loaded palette of gradients to apply them to your design by simply clicking on them. Or, you can load more gradients by clicking on the flyout arrow above the Presets and selecting a new set from the list.
The bottom half of the Gradient Editor is where the true customization happens. But first, there are some basics you need to know.
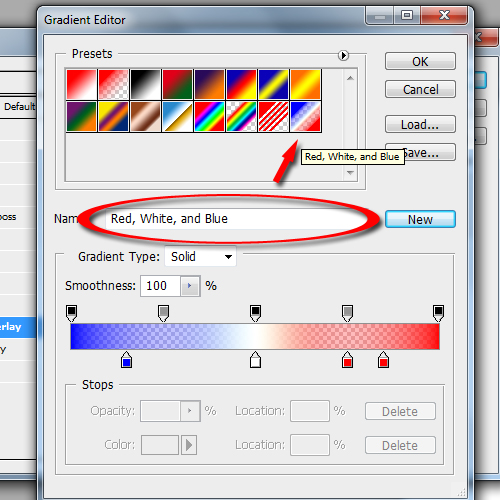
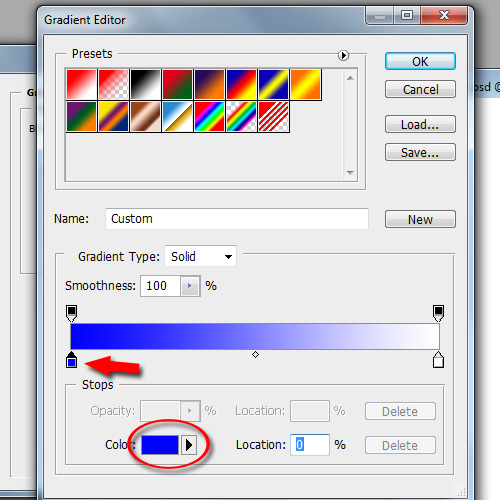
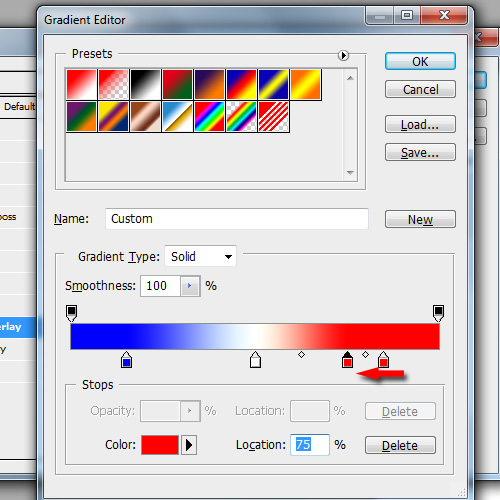
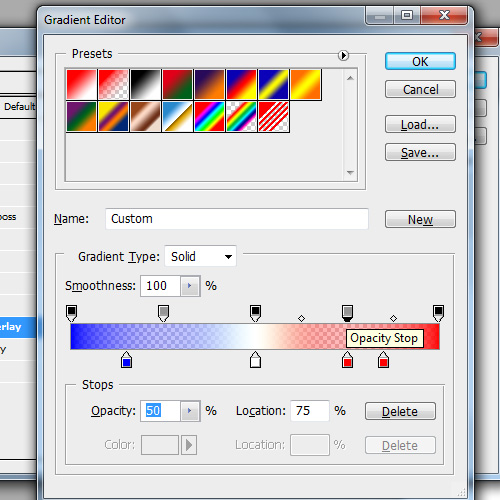
The colored bar is the gradient preview. To the bottom side of the gradient preview is where the Colors Stops are chosen and set, and to the top of the gradient preview is where Transparency Stops are selected and set.

Clicking on one of the boxes, or Stops, along the bottom will allow the color to be adjusted at that point along the gradient. Double click on the Color Stop or click on the Color display at the bottom of the dialog box to change the color. Select the color in the color dialog box, click OK and the color changes along the gradient preview.
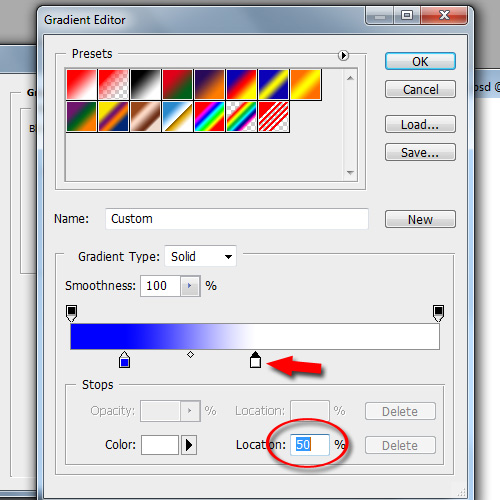
The Color Stops can be dragged to any place along the bottom of the gradient preview and the gradient will adjust to match the new placement of the Color Stop. You can also change the Location value to set the position of the Stop if precision is necessary. As shown below, the white point has been moved to the halfway point and the location value shows that it is 50% of the way across the gradient.
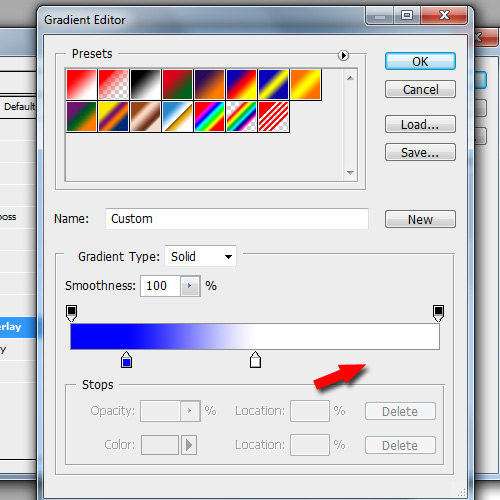
Making a single click along the bottom of the preview will add an additional Color Stop at that place in the gradient. The Color Stop will be set to the current foreground color.
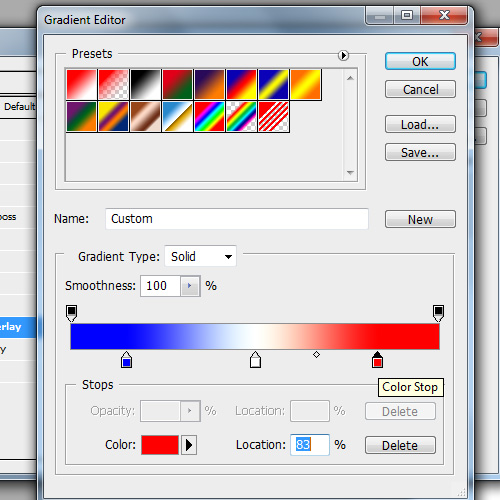
Another way to create a Color Stop is to hold down the Alt or Option key, click and drag a current Color Stop. This will create a copy of the selected Color Stop, which will be the same color as the copied stop.
The Opacity Stops along the top edge of the gradient preview work the same way as the Color Stops in editing, adjusting and copying. With Opacity Stops, you can set the opacity of the gradient along certain points of the gradient. A value of 100% leaves the gradient completely visible. The lower the value, the more transparent the gradient colors become.
Once the gradient settings are to your liking, add the Name and click New, and the gradient will be saved into the Presets in the upper portion of the dialog box. It is now available to be easily applied to any other design element.