A Photoshop tutorial by Art Director and founder of Pureworks, Victoria Jordan.
In this tutorial, we’ll focus on superimposing images onto a more complex 3D objects. Last time we put images onto flat surfaces. This time, we’ll put images onto round objects, which is a little trickier.
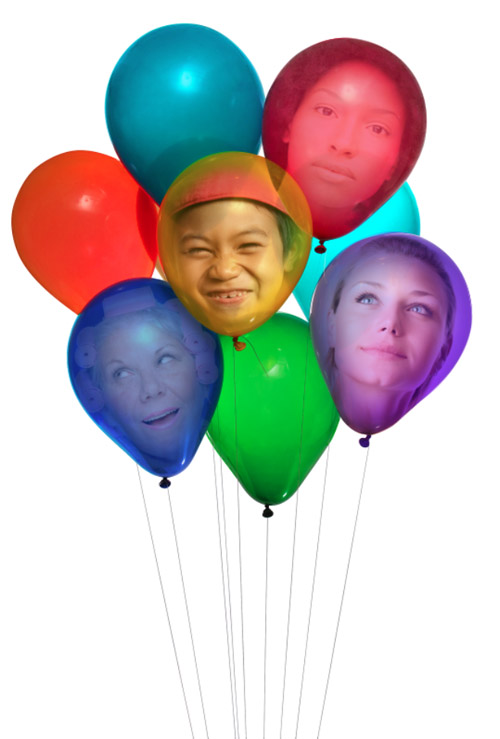
First, I’ll pick my round object. I’m going to superimpose faces onto the surfaces of these party balloons from contributor jgroup
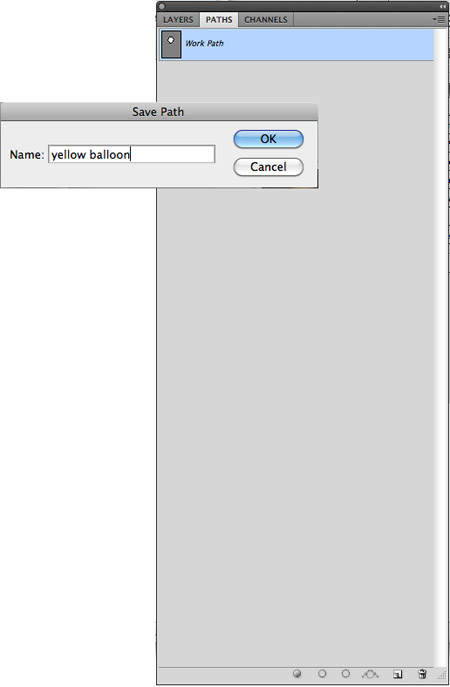
The first thing I’m going to do is silhouette each balloon, this will make it easier when we begin to shape the faces over the balloons. I’m going to use the pen tool to create paths. Each path starts out as a Work Path.
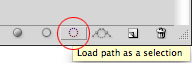
I hit the Load Path As Selection button in the Paths palette and copy (Command C) and Paste (Command V) the selection (our yellow balloon) onto it’s own layer.
After I finish this step for each, I’m going to go back and name the path. If I don’t, the path will be erased when I start a new one. To do this, I double-click on the path and type a name.
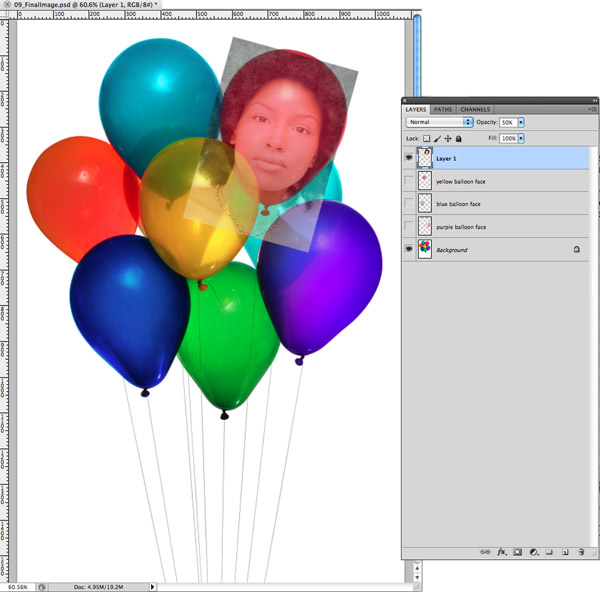
Now I’m going to bring the face images in. After I drag them each into their own layer, I’m going to make all the layers invisible but one.
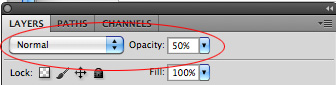
After making the face layer transparent (about 50%, we’ll ultimately keep it transparent so we can see the highlights and reflections in the balloon through the face) so I can see the target balloon underneath, I’ll scale it (Command T – hold down the shift key to keep the scale proportional as you drag one of the corners in) down to fully cover the balloon. I rotate it, leaving a bit of the face all around the balloon.
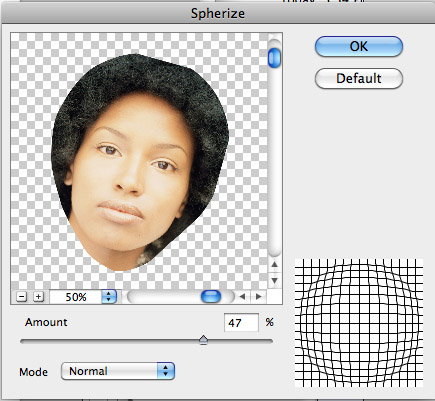
Now, I’ll go back to my path for the balloon I’ve chosen to work with. Making sure I’m on the face layer, I click the Load Path As Selection button, then invert the selection (Select > Inverse). Now I hit delete and I have only the portion of the face that’s over the balloon. I select the inverse again, go to Filter > Distort > Spherize.
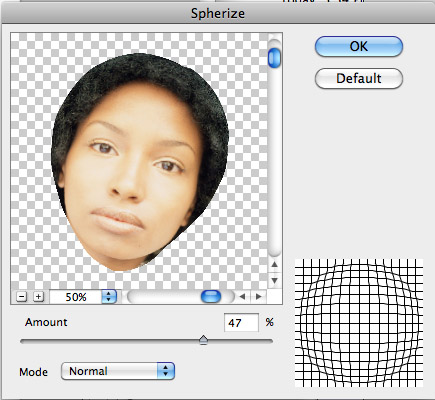
I’m going to experiment with the Amount of distortion when I Spherize, After I find the amount I feel works best, (It’s sometimes difficult to see the level of distortion with some objects in the Spherize dialogue, but if you click and hold down within the preview area, you can see where the image was before distortion) I hit OK.
I’m going to continue these steps for the other faces on the other balloons.
After these steps are finished and the faces are all placed properly, we should take a look at how the balloons are shadowed and what the edges look like in the original balloon photo so we can mimic the gradations of color.
Now, most of the edges of the balloons are darker than the interiors, so I’m going to bring in those edges to add some dimension to our faces.
Let’s start with the yellow balloon. I got back to the background layer, and then, using our Yellow Balloon path, make a selection. I copy and paste the yellow balloon (Command C, Command V) into a new layer. I drag the new layer above the one containing the yellow balloon face.
I select the balloon again, using my path, and I Contract the selection (Select > Modify > Contract) by 50 pixels.
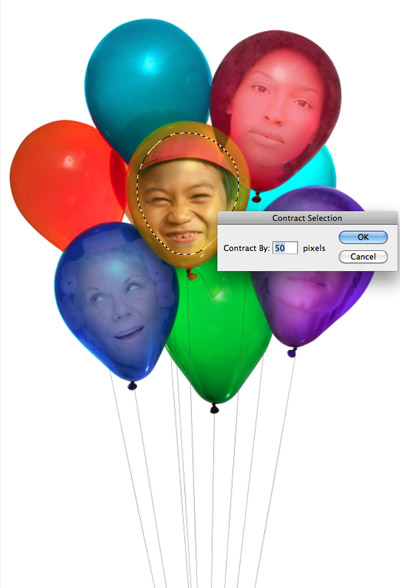
I don’t want the edge of our darkened area to be hard, so I’ll Feather the selection by half the amount of pixels that I contracted the selection (Select > Modify > Feather). This will fade the edges of our balloon into our face image. I’ll hit delete and voila! There’s our face with darker edges.
At this point, I’m going to choose to make the our shading layer transparent so that it becomes more realistic. For each balloon, depending on it’s color, I will play with the opacity as well as the mode in both the shading layers and face layers to see what looks most realistic.
For each step in this process, find the level that works best for you. It may feel more realistic to you to Spherize the faces more than once to achieve a more apparent distortion, or maybe next time you’d like to use a negative number in the Spherize dialogue to pinch an image rather than bloat it. So many possibilities and so much fun!