Updated by designer Cristin Burton on Feb. 17th, 2015.
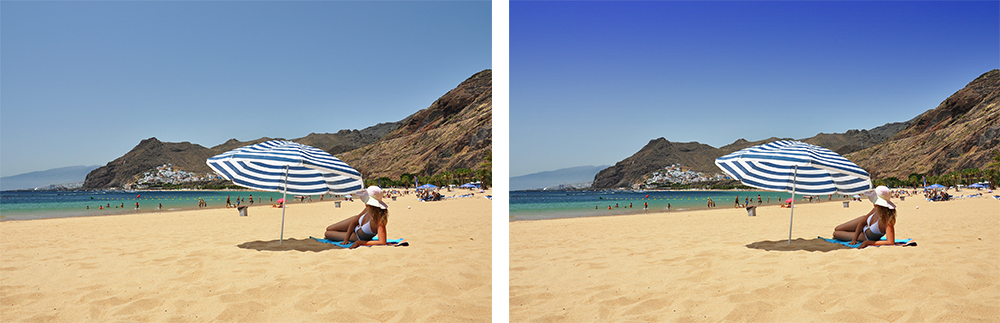
This Adobe Photoshop tutorial will show you to use adjustment layers and layer masks to adjust parts of a photo. This demo was on in Adobe Creative Cloud, but should apply in several other versions as well. In this tutorial I will adjust only the sky of the following photo to magically be bright and beautiful.
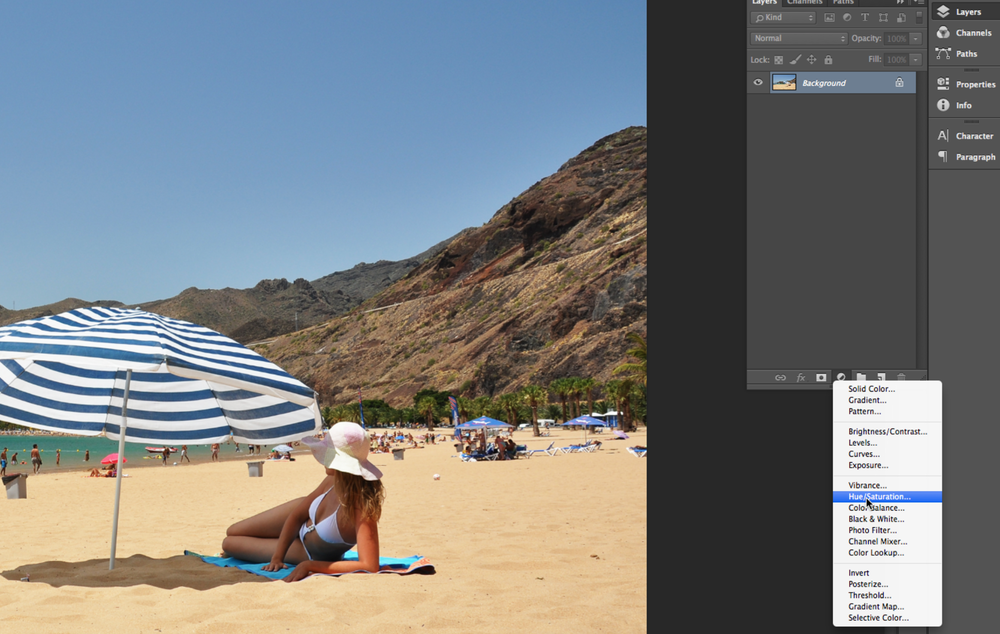
1. Open your image in Photoshop and make sure your layers panel is visible. (If it isn’t, go to Window>Layers) Create a new adjustment layer by clicking on the icon at the bottom of the pallet that looks like a half-black/half-white circle. For this demo, we’re going to create a Hue/Saturation adjustment layer.
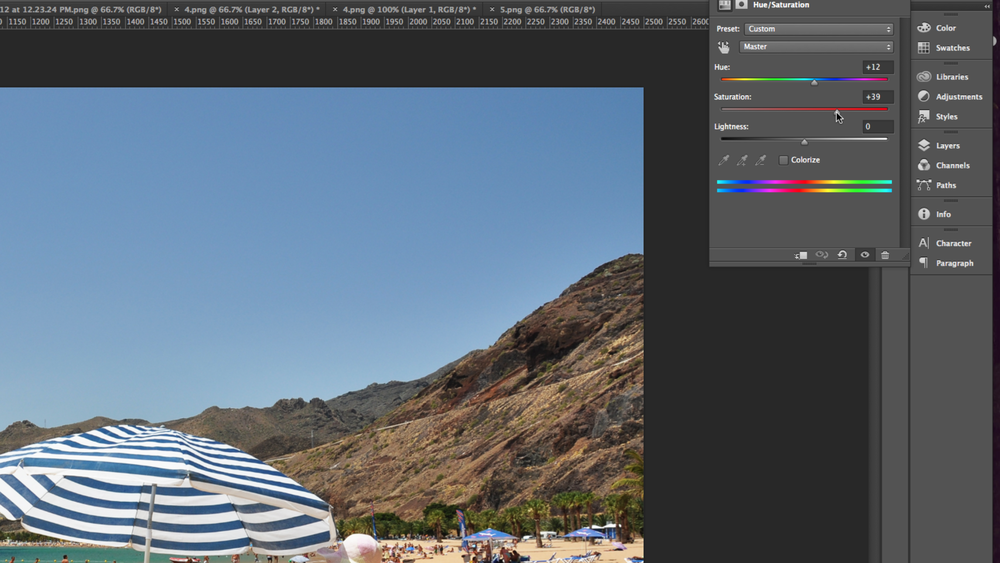
2. Adjust Hue/Saturation. After you create this layer, you should see some slider adjustments in the hue/saturation window. Adjust the sliders to the most extreme settings you’ll want in your image. In this case, we’re going to make the sky a deeper, more vivid shade of blue. The nice thing about adjustment layers is that you can always go back and change this later.
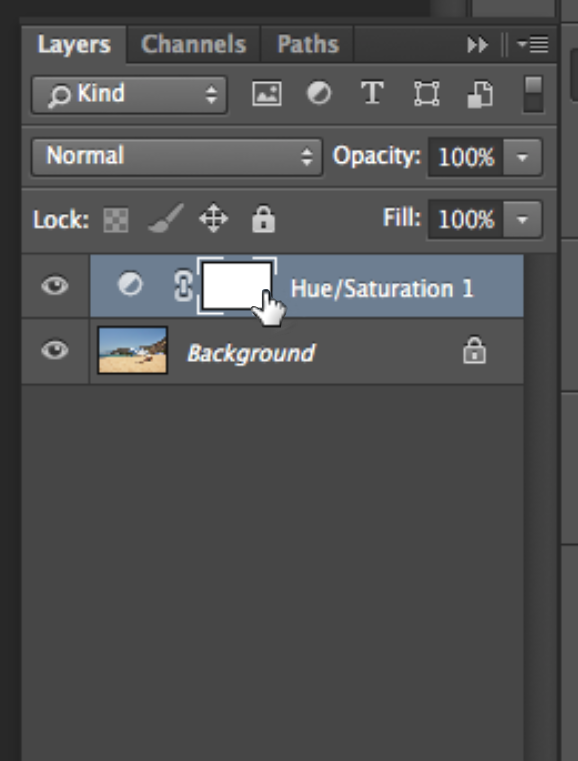
3. Select layer mask. Return to the layers tab and select the white rectangle that’s linked to your adjustment layer. This is your layer mask. Think of it like an invisible grayscale image that tells Photoshop how much of the adjustment to apply to each pixel of your image. White areas of the mask will apply the adjustment layer fully, while black parts will apply no adjustment at all.
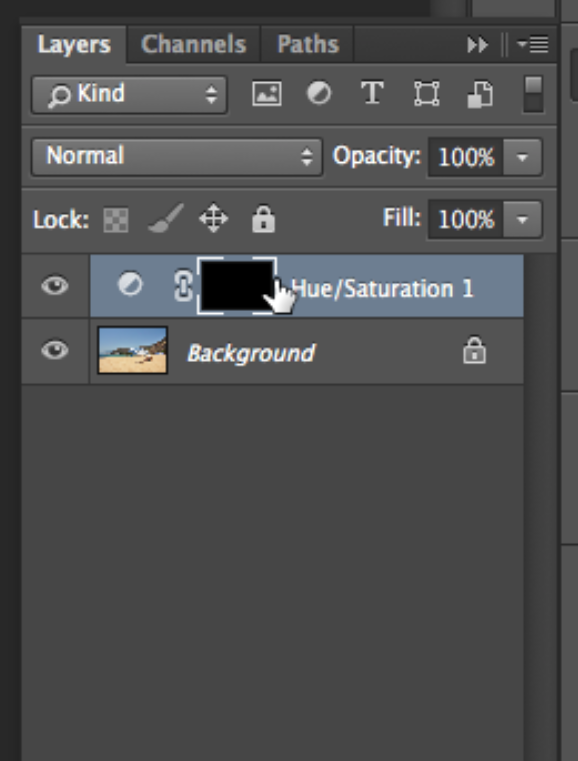
4. Fill layer mask. Now that you’ve selected the layer mask, fill it with black. Make sure black is one of the colors in your color selector, and go to Edit>Fill or option-delete (alt-delete in windows) Your image will revert to its original appearance.

5. Select the sky. Next, select the areas of your image where we want to apply the adjustment. In the image above, select the wand tool and set the tolerance level at around 20. Then click to select the blue sky. You probably need to add to the selection (shift + click with magic wand) and use your lasso tool to further clean it up.

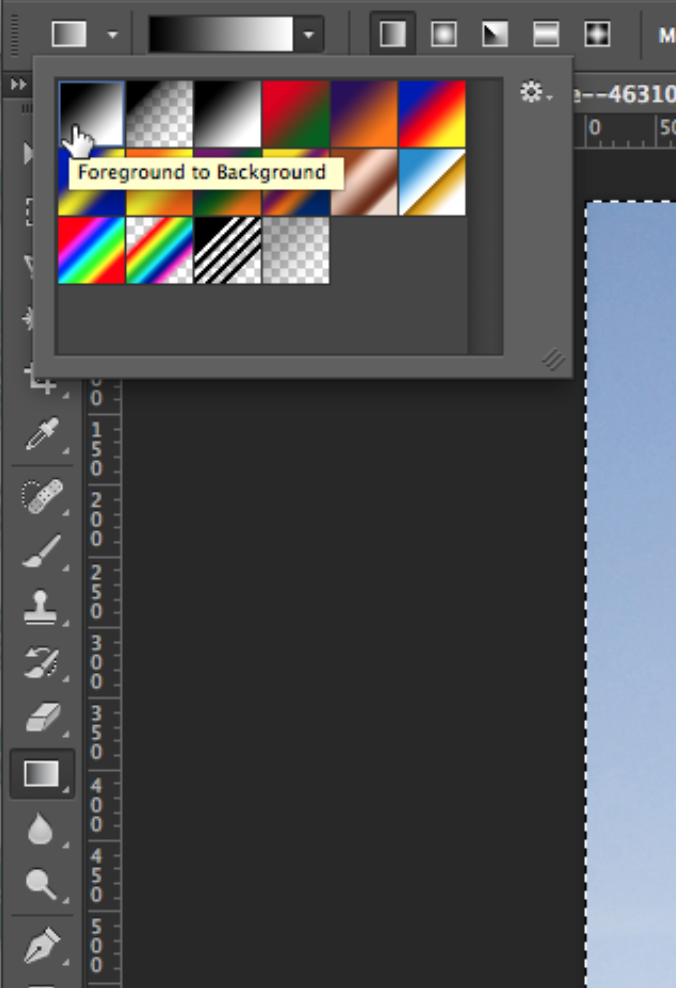
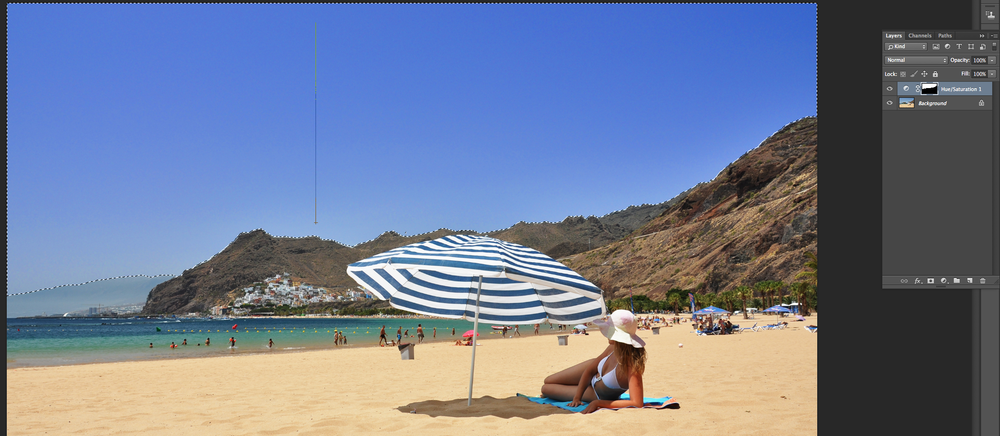
6. Apply a gradient to the layer mask. Keeping this area selected, click back on the layer mask we filled with black in step 4. Use the gradient tool to fill this selection with a gradient from white to black, with white at the top. To do this, make sure black and white are the selections in your color selector, and drag the gradient tool while holding down the shift key, which will ensure the gradient is perfectly level.
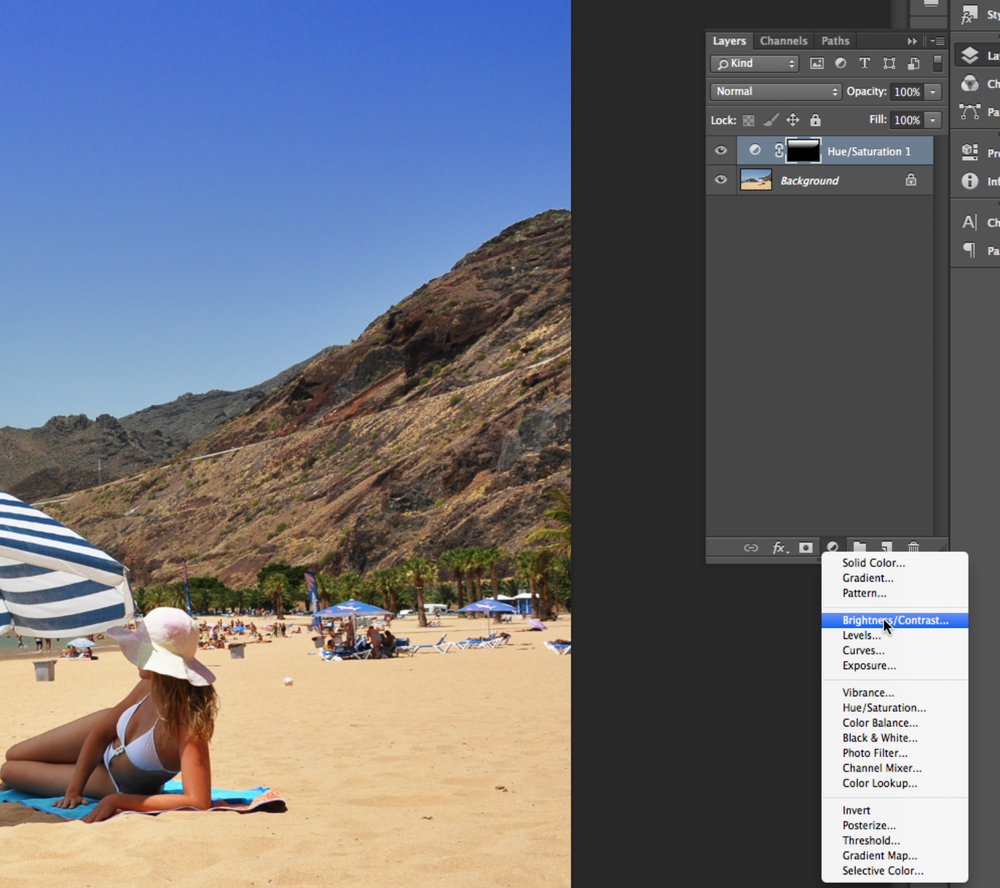
7. Add another adjustment layer. Guess what? You can add more adjustment layers! In this example, I’m going to add a Brightness/Contrast layer.
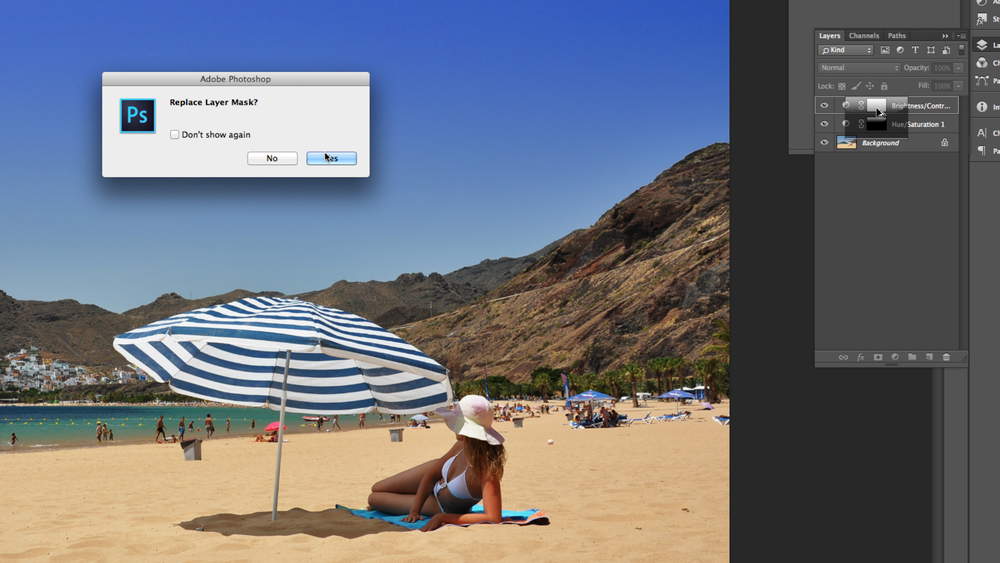
Try click & dragging the layer mask of the hue/saturation layer while holding down the option key and then dropping it over the layer mask of the new brightness contrast layer. You will give the brightness/contrast layer the same gradient layer mask of the hue/saturation layer. Photoshop will ask you if you want to replace the mask. Click yes!
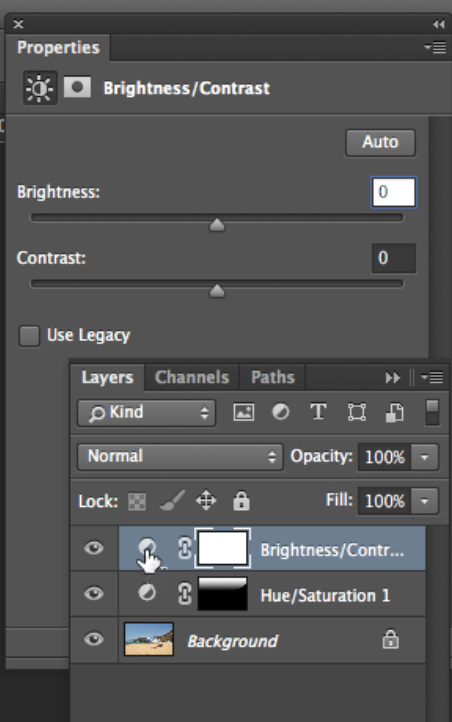
8. Tips. And again, you can go back and edit either layer at any time, which is the beauty of adjustment layers. You can do this by double-clicking on the layer icon itself (not the layer mask), and the Properties palette will open for you to make your adjustment.
You can also use the black brush tool or the erase tool fill in or subtract from your layer mask. This will help you to make smaller adjustments to the shape of layer mask.
Here’s the final image. Oh my gosh, it looks fantastic! That is the most beautiful sky I have ever seen!
RELATED POSTS: